Python ChatGPT API and DeepSeek API: Straight‑to‑the‑Point Guide 🐍🤖
ChatGPT is the future and not knowing its capabilities will limit your ability to produce high quality code faster than your peers.
No fluff — just working answers and bite‑sized code samples.
🤔 Can I actually use ChatGPT in Python?
Yes! Integrating ChatGPT with Python is simpler than cooking instant noodles 🍜. All you need is to pip install openai, your API key, and a few lines of Python code. Let’s do this!
🤩 Is ChatGPT Python API free?
No. Even if you subscribe to ChatGPT Plus/Pro, API usage is billed separately.
OpenAI’s API runs on a pay-as-you-go model, so you can begin experimenting for just a few dollars. If you're just learning you can start with as little as $5 to get started.
💸 Python ChatGPT API Pricing
The prices vary by the model utilized and it's based per 1M tokens.
As of the time of this writing, consider these three examples using popular models o1, 4o and gpt-image-1 (to create that cool Studio Ghibli Photos):
| Alias | Model | $ Input Token | $ Cache Input | $ Output Token |
|---|---|---|---|---|
gpt-4o |
gpt-4o-2024-08-06 |
$2.50 | $1.25 | $10.00 |
o1 |
o1-2024-12-17 |
$15.00 | $7.50 | $60.00 |
gpt-image-1 |
gpt-image-1 |
$10.00 | $2.50 | $40.00 |
Prices might have gone up (or down - who knows?), so make sure to evaluate the Official ChatGPT Pricing Page.
🧩 What's ChatGPT Input and Output tokens?
Tokens are how ChatGPT reads and writes text. Instead of full words, it breaks everything into small chunks called tokens — like pieces of words, punctuation, or spaces.
You pay for both the tokens you send (input) and the ones you get back (output).
| Text | Token Count |
|---|---|
| Hello | 1 token |
| Hello, world! | 4 tokens (Hello, ,, world, !) |
| I love Python. | 4 tokens (I, love, Python, .) |
Don't be fooled. 1 word != 1 token because 1 token is about 4 characters of English text and there are words that are counted differently due to their complexity.
| Word Example | Token Count Breakdown |
|---|---|
unbelievable |
un, believable → 2 tokens |
extraordinary |
extra, ordinary → 2 tokens |
internationalization |
international, ization → 2 tokens |
transportation |
trans, port, ation → 3 tokens |
misunderstanding |
mis, under, standing → 3 tokens |
counterproductive |
counter, pro, duct, ive → 4 tokens |
disproportionately |
dis, pro, portion, ately → 4 tokens |
And you don't even have to trust me, you can go straight to OpenAI Tokenizer and check it for yourself:
💰 Caching ChatGPT Tokens to save money
Being practical, how can I optimize my tokens so I pay less?
Well, you could shorten prompts and messages, after all we learned that fewer tokens = lower cost but that's not easy.
Instead of putting effort into picking the right tokens (or words), you can try to use caching as much as possible to your advantage.
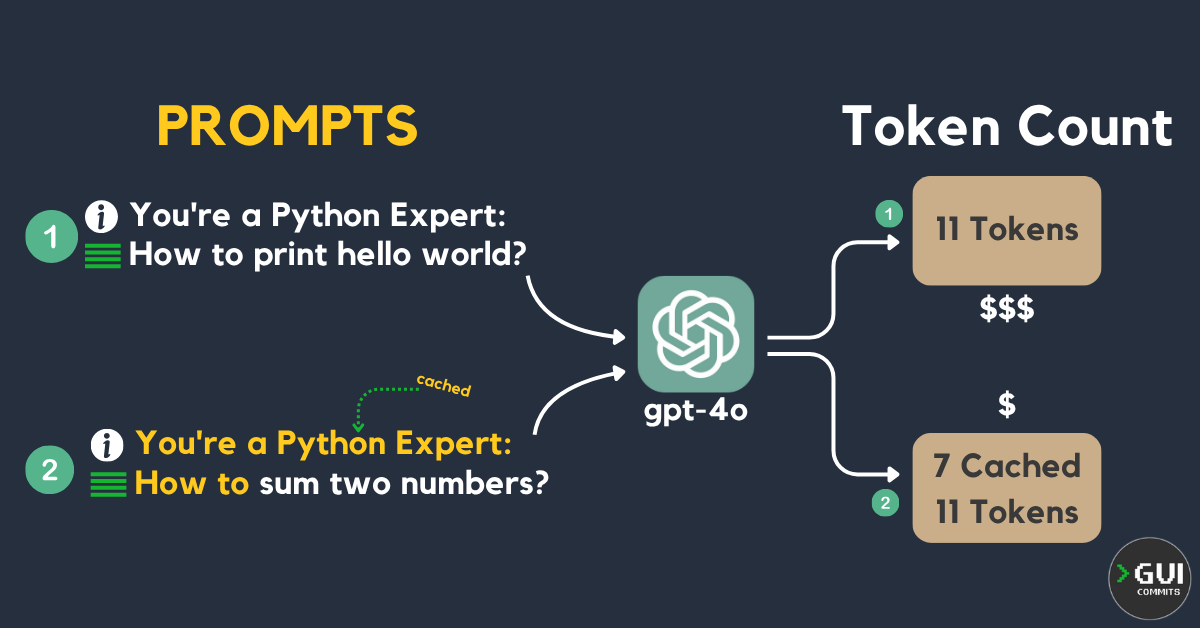
When you use ChatGPT API you're automatically using the caching capability. The API caches the longest prefix of a prompt recently used. After the first call you get 5–10 minutes to reuse it.
| Request # | Prompt | Token Count |
|---|---|---|
| #1 | You're a Python Expert: How to print hello world? | 11 Tokens - No cache |
| #2 | You're a Python Expert: How to sum two numbers? | 11 Tokens, 7 Tokens Cached |
| #3 (After ~10 min of inactivity) | You're a Python Expert: How to sum two numbers? | 11 Tokens - No cache |
Hitting caches would save you 50% of the current model pricing. (e.g. $2.5 regular -> $1.25 for cached).
You can check the usage when using the API so you can evaluate if the prompt worked as you expected. Let's see it later.
Don't forget you also pay for output tokens which you can't really control.
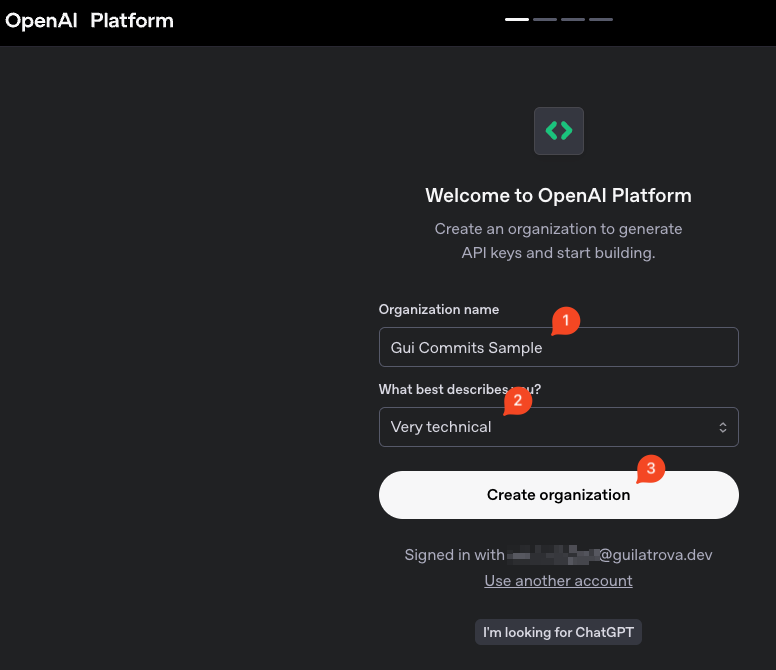
🔑 Creating a ChatGPT API Token (If you don't have one yet)
If you already have created your account you can skip this section.
Just give a cool name to your organization (either "Personal" or "Hobbies" should be fine).
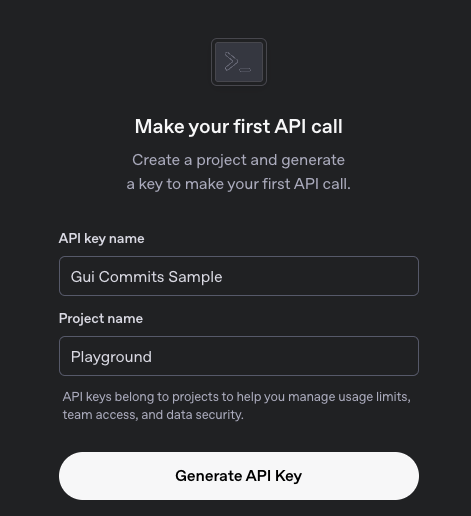
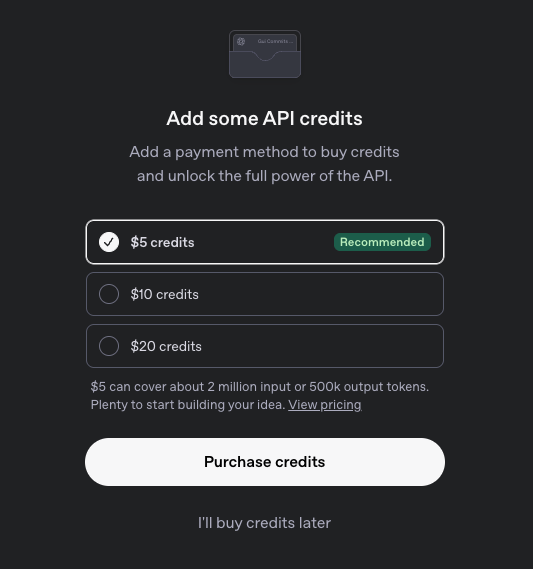
Pay for it. If you're just experimenting, I recommend paying only $5 and sticking to model gpt-4.1-nano which is the cheapest.
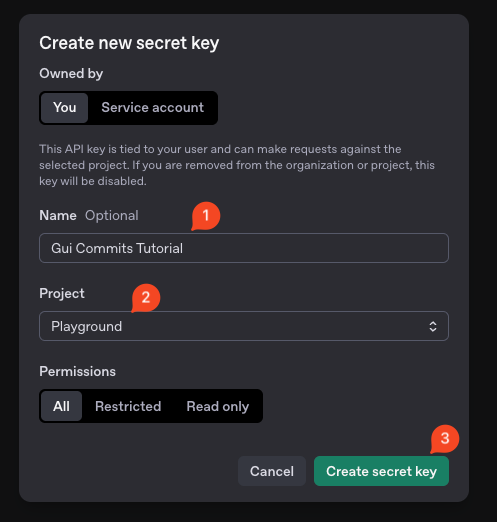
How to create my ChatGPT API Token
Assuming you already have an account.
We can start by visiting OpenAI's Platform API Keys Page (Not the regular ChatGPT page).
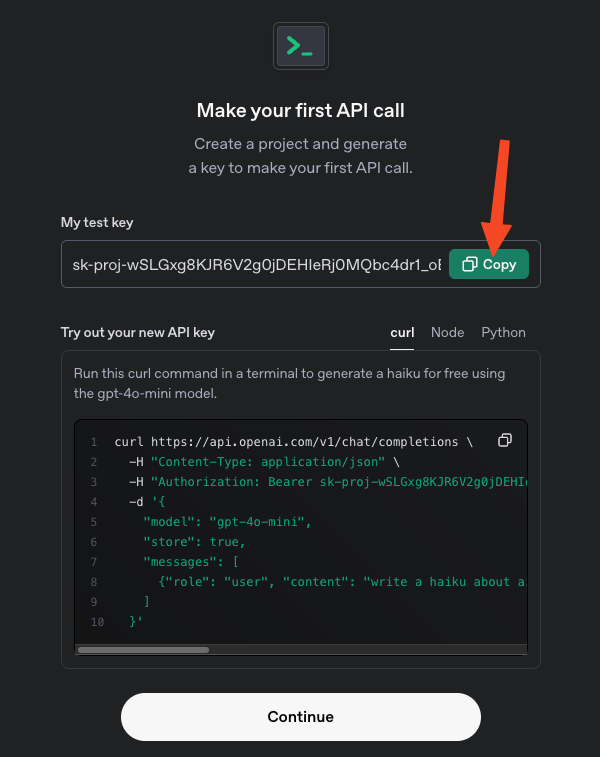
Click on Create new secret key and submit it:
🧑💻 ChatGPT API Example using responses.create
To get you started you must install openai by running: pip install openai. I'm also installing rich to display the data nicely.
import typing as t
from openai import OpenAI
from rich import print

API_KEY: t.Final = "sk-proj-[REDACTED]"
MODEL: t.Final = "gpt-4.1-nano"  # Cheapest: $0.10 Input / $0.40 Output


class PythonExpert:
    def __init__(self):
        self.client = OpenAI(api_key=API_KEY)

    def ask_the_expert(self, question: str):
        response = self.client.responses.create(
            model=MODEL,
            instructions="You're a Python expert. Answer the question as best you can.",
            input=question,
        )

        return response


def main():
    expert = PythonExpert()

    question = 'How do I print "Hello, world!" in Python?'
    response = expert.ask_the_expert(question)
    answer = response.output_text

    print(f"[yellow]Question:[/yellow] {question}")
    print(f"\tAnswer: {answer}")


if __name__ == "__main__":
    main()
Note we're using client.responses.create. This is a recent release from 2025, and it supports background execution, web search, file search, memorize history, and interact with GUI.
You might decide to stick to the old client.chat.completions.create() if you want to keep the history and context locally.
🧑💻 How to measure ChatGPT API Token Caching?
Let's say you want to measure your prompts to see how much caching you can get to optimize costs.
ChatGPT Caching only works for prompts with > 1,024 tokens. For our example I’m going to provide an extremely long instruction and try to be as verbose as possible:
import typing as t
from openai import OpenAI
from rich import print
from rich.console import Console
from rich.table import Table as RichTable
from textwrap import dedent


API_KEY: t.Final = "sk-proj-[REDACTED]"
MODEL: t.Final = "gpt-4.1-nano"  # 👈 Cheapest: $0.10 Input / $0.40 Output


class PythonExpert:
    def __init__(self):
        self.client = OpenAI(api_key=API_KEY)

    # NOTE: 👇 Since we're simulating token caching, we need to ensure it has at least 1,024 tokens.
    # Part of this initial prompt boilerplate will ALSO be cached.
    BASE_PROMPT_BULLSHIT = dedent(
        """
    ─────────────────────────  PYTHON EXPERT SYSTEM REFERENCE GUIDE  ─────────────────────────

    SECTION 1  - Code Style (PEP 8)
    ▸ Prefer *snake_case* for variables and functions, *PascalCase* for classes, and UPPER_SNAKE_CASE for module -level constants.
    ▸ Keep lines ≤ 79 chars; wrap long expressions with implied line -continuations inside (), [] or {}.
    ▸ Imports: standard lib ▸ third -party ▸ local, each block alphabetised; never use wildcard imports.
    ▸ Use f -strings for interpolation; reserve `%` formatting for logging -style placeholders.

    SECTION 2  - Typing & Static Analysis
    ▸ Add *type hints* (PEP 484) to every public function: def square(n: int | float) -> int | float: …
    ▸ Avoid `Any`; prefer Protocols and generics for flexible APIs.
    ▸ Run *mypy* or *pyright* in CI; treat *warnings as errors* to prevent regressions.
    ▸ Use *typing -extensions* for back -ports of upcoming features (e.g. TypeAliasType).

    SECTION 3  - Performance & Profiling
    ▸ Use built -ins and std -lib (sum, max, heapq) before reaching for numpy or pandas; C -optimised code often beats naive C -extensions.
    ▸ Profile first!  `python  -m cProfile  -o stats.prof main.py` + *snakeviz* to visualise hotspots.
    ▸ Favour list -comprehensions over explicit loops where readability permits; avoid premature micro -optimisation.
    ▸ For numeric hotspots consider `numba` or Cython; for I/O hot paths, use buffering and async.

    SECTION 4  - Concurrency & Parallelism
    ▸ *asyncio* excels at I/O -bound workloads: await network, file, or DB calls without blocking the event -loop.
    ▸ For CPU -bound tasks use `concurrent.futures.ProcessPoolExecutor` or *multiprocessing*; the GIL limits pure threads.
    ▸ Shield long awaitables with `asyncio.to_thread` in 3.9+ when you need to run a sync function without freezing awaitables.
    ▸ Never share mutable state across processes without proper IPC (queues, managers, shared memory).

    SECTION 5  - Packaging & Distribution
    ▸ Adopt *pyproject.toml*; specify build -system (`[build -system] requires = ["setuptools>=64", "wheel"]`).
    ▸ `python  -m build` produces sdist + wheel; upload via *twine* to TestPyPI first.
    ▸ Use *semantic -versioning*: MAJOR → breaking, MINOR → features, PATCH → fixes.
    ▸ Provide rich metadata (classifiers, project -urls) so pip search surfaces your project.

    SECTION 6  - Testing Philosophy
    ▸ Prefer *pytest*; write small, deterministic tests—no sleeps or network calls.
    ▸ Isolate side -effects with fixtures + tmp_path; parametrize happy -path and edge cases.
    ▸ Aim for behaviour over implementation: changing internals should not break tests as long as public contract holds.
    ▸ Track coverage but don't chase 100 %; guard against critical regressions instead.

        SECTION 7 - Debugging & Logging
    ▸ Insert `breakpoint()` (Python 3.7+) to drop into pdb without imports; use `pdbpp` for nicer colours & sticky mode.
    ▸ Configure *logging* early: level via env var, write JSON logs in production, colourised human -friendly logs locally.
    ▸ Never log secrets; scrub tokens/IP addresses with custom filters or structlog processors.
    ▸ Prefer structured logging over free -text for easier log aggregation and querying.

    SECTION 8 - Security Best Practices
    ▸ Load secrets from the environment or a secrets -manager—never hard -code keys.
    ▸ Pin dependencies with hashes (`pip -tools`, `poetry lock --no-update`); audit with `pip-audit` or GitHub Dependabot.
    ▸ Validate user input; distrust deserialisation (yaml.load, pickle).  Use `json.loads` or pydantic models instead.
    ▸ Keep Python patched (security -fix releases); run containers as non -root and drop capabilities.

    SECTION 9 - Data Classes & Validation
    ▸ Use `@dataclass(slots=True, frozen=True)` for lightweight value objects; benefits: immutability & memory savings.
    ▸ For external data, model with *pydantic* or *attrs* for runtime validation and parsing.
    ▸ Document JSON schema; version breaking changes.  Provide migration scripts between schema versions.
    ▸ Convert between domain models and persistence DTOs to keep layers isolated.

    SECTION 10 - Command -line Interfaces (CLI)
    ▸ Prefer *typer* (built on click) for ergonomic CLIs with auto -generated help and type -hints.
    ▸ Support `--version`, `--help`, exit codes (0 success, non -zero failure).  Provide rich `stderr` messages for errors.
    ▸ Package entry -points under `[project.scripts]` in *pyproject.toml* so `pipx` users can install system -wide.
    ▸ Test CLI commands with `pytest` + `capsys` or *click.testing*'s runner.

    SECTION 11 - Configuration Management
    ▸ Hierarchy: CLI args ▶ env vars ▶ `.env` file ▶ config file ▶ defaults.  Later overrides earlier.
    ▸ Use *dynaconf* or `pydantic.Settings` for 12 -factor -style config loading.
    ▸ Keep secrets out of git; supply sample env files for local dev.
    ▸ Provide schema validation so a broken config fails fast at startup.

    SECTION 12 - Documentation & Docstrings
    ▸ Write *Google -style* or *NumPy -style* docstrings; include type hints, parameter descriptions, return values, raises.
    ▸ Generate docs with *mkdocs -material* or *Sphinx* + *autodoc*; host on GitHub Pages.
    ▸ Keep examples runnable: embed doctests or use *pytest -doctestplus*.
    ▸ Treat docs as code: review PRs, run spell -checkers (codespell), and enforce link rot checks.

    ───────────────────────────────────────────────────────────────────────────────────────────
    """
    )

    def ask_the_expert(self, question: str):
        response = self.client.responses.create(
            model=MODEL,
            instructions=self.BASE_PROMPT_BULLSHIT,
            input=question,
        )

        return response

# 👇 Organize & Output it nicely
def _create_table() -> RichTable:
    table = RichTable(title="Token Usage Summary")
    table.add_column("[bold]Prompt[/bold]")
    table.add_column("[bold]Input Tokens[/bold]", justify="right")
    table.add_column("[bold]Cached Tokens[/bold]", justify="right")
    table.add_column("[bold]Output Tokens[/bold]", justify="right")
    table.add_section()

    return table


QUESTIONS = [
    'How do I print "Hello, world!" in Python, and why is `print` a function rather than a statement?',
    # 👆 Verbose
    # 👇 Somewhat simple to simulate cache hitting
    'How do I print "Hello, world!" in Python?',
]


def main():
    expert = PythonExpert()
    table = _create_table()
    console = Console()

    for question in QUESTIONS:
        response = expert.ask_the_expert(question)

        answer = response.output_text
        input_tokens = response.usage.input_tokens
        cached = response.usage.input_tokens_details.cached_tokens
        output_tokens = response.usage.output_tokens

        print(f"[yellow]Question:[/yellow] {question}")
        print(f"\tAnswer: {answer}")

        table.add_row(
            question,
            str(input_tokens),
            str(cached),
            str(output_tokens),
        )

    console.print(table)


if __name__ == "__main__":
    main()

Since we know that gpt-4.1-nano charges $0.10 / $0.025 / $0.40 we can calculate:
| Prompt # | Uncached Input Tokens | Cached Input Tokens | Output Tokens | Estimated Cost |
|---|---|---|---|---|
| #1 | 1,369 | 0 | 227 | $0.0002277 |
| #2 | 107 | 1,262 | 30 | $0.00005926 |
📐 Structuring ChatGPT responses as JSON Models
When you're creating your tool you probably want a structured response to ensure the output has a known format.
You can achieve that by using Pydantic and ChatGPT's client.responses.parse.
- Define your expected response model with Pydantic;
- Update to use
client.responses.parse - Update
instructionsto mention what you expect to be parsed - Pass your model as the
text_formatkeyword argument - Get
response.output_parsed
import typing as t
from openai import OpenAI
from rich import print
from pydantic import BaseModel

API_KEY: t.Final = "sk-proj-[REDACTED]"
MODEL: t.Final = "gpt-4.1-nano"  # Cheapest: $0.10 Input / $0.40 Output


# 👇 Define the expected output model
class ExpertResponse(BaseModel):
    explanation: str
    example_code: str


class PythonExpert:
    def __init__(self):
        self.client = OpenAI(api_key=API_KEY)

    def ask_the_expert(self, question: str) -> ExpertResponse:
        # 👇 Use `responses.parse`
        response = self.client.responses.parse(
            model=MODEL,
            # 👇 Explain what you're willing to receive
            instructions="You're a Python expert. Answer the question as best you can. Give a brief explanation and provide example code if applicable.",
            input=question,
            # 👇 Pass expected output model
            text_format=ExpertResponse,
        )

        # 👇 Pass the parsed model
        return response.output_parsed


def main():
    expert = PythonExpert()

    question = 'How do I print "Hello, world!" in Python?'
    response = expert.ask_the_expert(question)

    print(f"[yellow]Question:[/yellow] {question}")
    print(f"[yellow]Explanation:[/yellow]\n\t {response.explanation}")
    print(f"[yellow]Example Code[/yellow]:\n\t{response.example_code}")


if __name__ == "__main__":
    main()
And it works as expected:

Without it, you’d have to include more instructions to force ChatGPT to reply in the expected format. I did it many times, it's not a pleasant experience.
💰 Cheaper API alternative to OpenAI's ChatGPT
DeepSeek is significantly cheaper than ChatGPT (from my experience a bit slower though):
| ChatGPT Model | Pricing/1M Input Tokens | DeepSeek Model | Pricing/1M Input Tokens |
|---|---|---|---|
gpt-4o |
$2.50 | deepseek-chat |
$0.27 |
o3 |
$10.0 | deepseek-reasoner |
$0.55 |
Still not cheap enough? Okay, you can get this even lower by using it during off-peak hours giving you up to 75% OFF:
| DeepSeek Model | Cached | Regular Hours Pricing/1M Tokens | Discount Off-Peak Hours/1M Tokens |
|---|---|---|---|
deepseek-chat |
No | $0.27 | $0.135 |
deepseek-chat |
Yes | $0.07 | $0.035 |
deepseek-reasoner |
No | $0.55 | $0.135 |
deepseek-reasoner |
Yes | $0.14 | $0.035 |
🐳 Python DeepSeek API vs ChatGPT API
Alright, let’s use DeepSeek, but... Now I have to install yet another lib and modify my working code?
No. You don't need to install anything else but openai (as we already did).
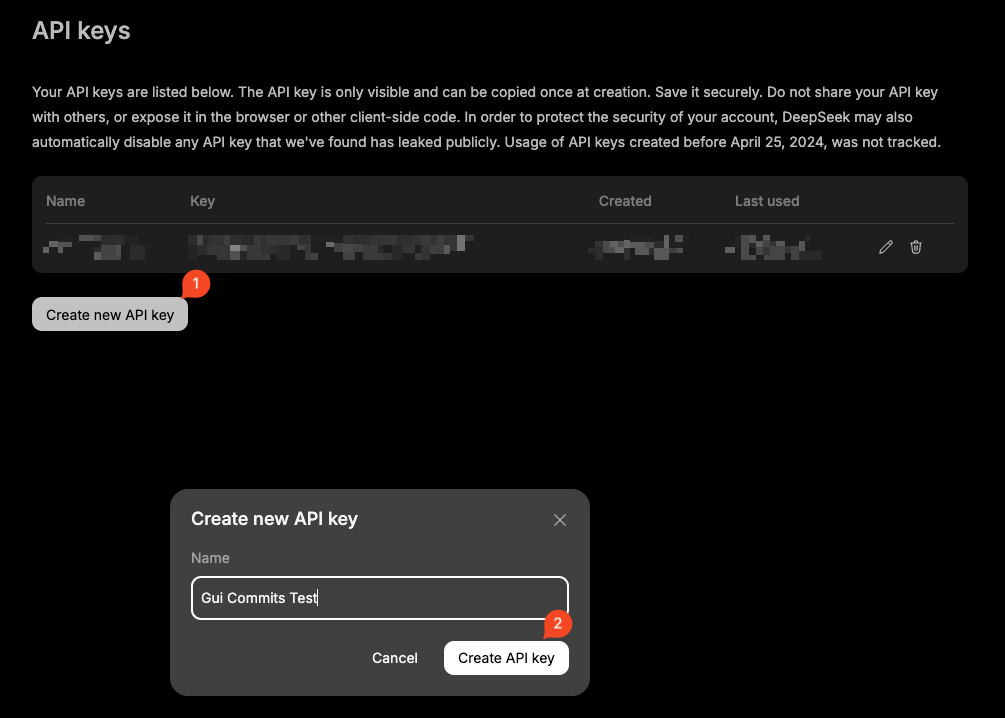
You can create your DeepSeek API Key here.
You just can't use client.responses.create, you need client.chat.completions.create.
import typing as t
from openai import OpenAI
from rich import print

API_KEY: t.Final = "sk-[REDACTED]"
MODEL: t.Final = "deepseek-chat"


class PythonExpert:
    def __init__(self):
        self.client = OpenAI(
            api_key=API_KEY,
            # 👇 The trick!
            base_url="https://api.deepseek.com/v1",
        )

    def ask_the_expert(self, question: str):
        response = self.client.chat.completions.create(
            model=MODEL,
            messages=[
                # 👇 System message to set the context, analogous to `instructions`
                {
                    "role": "system",
                    "content": "You're a Python expert. Answer the question as best you can.",
                },
                # 👇 Actual request
                {"role": "user", "content": question},
            ],
        )

        return response


def main():
    expert = PythonExpert()

    question = 'How do I print "Hello, world!" in Python?'
    response = expert.ask_the_expert(question)
    # 👇 Not much user friendly
    answer = response.choices[0].message.content

    print(f"[yellow]Question:[/yellow] {question}")
    print(f"\tAnswer: {answer}")


if __name__ == "__main__":
    main()
I hope you enjoyed learning these tricks. If it was useful give me a follow on X to be notified when I post new Python tricks.